(OK, first things first - I apologize for the quality of the pictures in this tutorial. I have to do a lot of my sewing at night after the kids go to bed, so I had to use a flash or low lighting on the pictures.)
Disclaimer: I am not an expert sewer. I have mostly taught myself, minus the little bit I remember from watching my grandmother sew when I was younger.
I'll start out with a picture of my sewing room:
Wait. That looks like my dining room. That's because it is. I only wish I had a sewing room, but you do what you gotta do, right?
Now, I'll introduce you to my friend, sewing machine:
I got her for my birthday this year and it has been the best gift I've ever gotten. I really do love to sew.
As far as the basis for this post, Chuck wanted some Christmas pillows for decorations this year, so I decided to see if I could sew some. Turns out, I can (well, good enough for ME anyway :)). I decided to post this tutorial for those of you who want to give it a try as well.
For this pillow, you will need:
3 different colors of felt (I have found that cut felt from the roll/bolt works better than the cheaper individual squares): For the main pillow body, you will need 1/2 yard at the least. For the ornaments, just 1/4 yard or less.
Yarn
Polyfil or similar stuffing
Cut your main color of felt into two 18 inch squares. (For my pillow I had one long piece, about 36 inches, that I just folded in half rather than cut into two squares. You can do it either way.)
To start, cut out 3 different (or the same, if you prefer) patterns of ornaments from one of your 1/4 yard pieces of felt. I found my patterns here:
http://myfantastictoys.blogspot.com/2009/11/felt-christmas-ornament-tutorial.html.
After you have your patterns cut out, you can embellish them however you like. I chose to cut "stripes" out of a different colored felt, using the third 1/4 yard of felt. I then sewed the stripes onto the ornaments in a coordinating colored thread. (Now, I had already sewed on my ornaments before I started taking pics for this tutorial, but you can still see what I did.)
Then, place your ornaments where you want them on the pillow, pin them to it and sew around the edges of the ornaments onto your pillow. I chose to stagger mine so they would look more like hanging ornaments.
Next, I used a pencil to draw a straight line from the top of each of my ornaments straight up to the top of the square.
Now, it's time to get your yarn out. For the next step, I used the biggest needle I had - with the biggest hole - to thread yarn through it. It is not easy to get through the eye, but just keep trying. Tie a knot in one end. The yarn is not doubled.
Your first stitch should start at the top or an ornament, as close to the edge of the felt as you can get. Come through the backside of your square, like you see here:
Pull the needle back through the felt, right through the pencil line you made earlier. You can make your stitch as long as you want.
You first stitch should look something like this:
Now, for your next stitch, come back through as close to the end of the first stitch as possible.
Continue to stitch like this until you have reached the top of the square, making sure your last stitch is pulled through the back of the square. Tie a knot in the end and cut the yarn. Do this for all of your ornaments.
Now, it's time to sew your pillow together! Put right sides together - it normally wouldn't matter with solid colored felt, but you'll want to make sure that your ornaments are facing in, rather than out.
Pin your squares together and sew all the edges closed, leaving about a 4 to 5 inch opening in the bottom.
You will now need to turn the pillow inside out, but before you do, clip your corners. This makes it easier to poke your corners out when you have turned the pillow right side out.
Now, turn your pillow inside out! Poke out the corners and you are almost done!
Stuff your pillow with Polyfil as full as you would like. Be sure to stuff the corners.
Now, to close the opening, you can either sew it closed with your sewing machine or you can hand stitch it. I chose to hand stitch it closed, so I would not have a seam. (Note: You WILL have a small seam if you use your sewing machine to close the opening.) I had not hand stitched before, so I used this tutorial to learn how to do it:
http://quilttaffy.blogspot.com/2008/07/invisible-closing-seam-tutorial.html
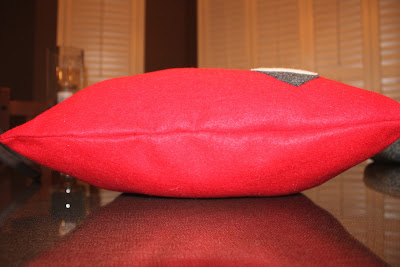
Here is what your pillow will look like with a closed seam (yours may look a lot better!):
And now, I have some pretty, HANDMADE Christmas pillows to use for decorating this year and each year after that. I hope you enjoyed the tutorial and I hope I didn't leave anything out!


